Understanding the Basics: What is a Rooftop Solar System?
Attention: Have you ever wondered how to install a rooftop solar system? With the rising costs of electricity and growing environmental concerns, many homeowners are considering solar power as a viable solution.
Problem: However, the process of installing a rooftop solar system can seem daunting.
Promise: Fear not! By understanding the basics, you can embark on this eco-friendly journey with confidence.
A rooftop solar system is a set of solar panels installed on the roof of a building, designed to convert sunlight into electricity. This system typically includes photovoltaic (PV) panels, an inverter, and a mounting structure. The PV panels capture sunlight and convert it into direct current (DC) electricity, which is then transformed into alternating current (AC) by the inverter, making it usable for household appliances.
Components of a Rooftop Solar System
- Solar Panels: These are the heart of the system, capturing sunlight and converting it into electricity.
- Inverter: Converts the DC electricity generated by the panels into AC electricity.
- Mounting Structure: Secures the panels to the roof, ensuring stability and optimal sunlight exposure.
Understanding these components is crucial before diving into the installation process. By familiarizing yourself with the basics, you’ll be better prepared to tackle the question of how to install a rooftop solar system, ensuring a smooth transition to sustainable energy.
Why Choose Solar? The Benefits of Installing a Rooftop Solar System
Environmental and Financial Benefits
Installing a rooftop solar system offers numerous advantages. Not only does it reduce your carbon footprint, but it also significantly cuts down on energy costs. Solar panels convert sunlight into electricity, which can power your home and even generate excess energy that can be sold back to the grid. This dual benefit of environmental conservation and financial savings makes solar an attractive option for many homeowners.
How to Install a Rooftop Solar System?
- Assessment and Planning: Begin by evaluating your roof’s suitability for solar panels. Consider factors like roof orientation, shading, and structural integrity.
- Choosing the Right System: Select a solar system that meets your energy needs and budget. Consult with a professional to ensure compatibility with your home.
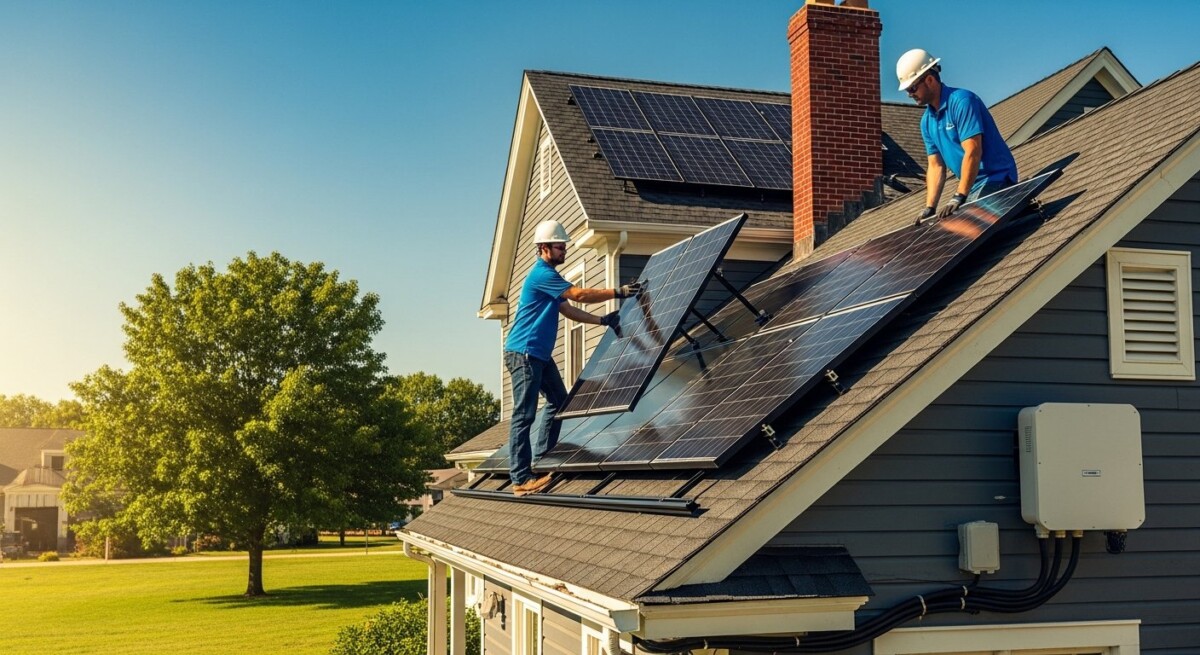
- Installation Process: Hire a certified installer to mount the panels securely. They will connect the system to your home’s electrical grid, ensuring optimal performance.
- Inspection and Maintenance: Regularly inspect your solar panels for debris and damage. Routine maintenance ensures longevity and efficiency.
Long-Term Gains
The initial investment in a rooftop solar system can seem daunting, but the long-term gains are substantial. Over time, the savings on energy bills and potential tax incentives can offset the installation costs. Moreover, solar panels can increase your property’s value, making it a wise investment for the future.
Is Your Roof Ready? Assessing Suitability for Solar Installation
Are you considering harnessing the power of the sun to cut down on energy bills and reduce your carbon footprint? Before diving into the details of how to install a rooftop solar system, it’s crucial to assess whether your roof is ready for this eco-friendly upgrade. A suitable roof ensures maximum efficiency and longevity of your solar panels, promising a seamless transition to renewable energy.
Roof Condition and Material
Start by evaluating the condition of your roof. Is it structurally sound, or does it need repairs? Solar panels are a long-term investment, so a roof in good condition is essential. Additionally, consider the roofing material. Asphalt shingles, metal, and tiles are generally compatible with solar installations, while slate or wood may pose challenges.
Orientation and Tilt
The orientation and tilt of your roof significantly impact solar panel efficiency. Ideally, a south-facing roof with a tilt angle equal to your latitude maximizes sunlight exposure. However, east or west-facing roofs can also work with slight efficiency adjustments. Assessing these factors helps in planning the optimal layout for your solar system.
Shade and Obstructions
Check for any potential shading from trees, chimneys, or nearby buildings. Even partial shading can drastically reduce the performance of your solar panels. Consider trimming trees or relocating obstructions to ensure your panels receive unobstructed sunlight throughout the day.

Ready to make the switch? Discover how solar power can lower your bills and boost your home’s efficiency. Get a Free Solar Estimate at FREE SOLAR POWER QUOTES
Step-by-Step Guide: How to Install a Rooftop Solar System?
Step 1: Assess Your Roof’s Suitability
Before diving into the installation, evaluate your roof’s condition and orientation. Ensure it can support the weight of solar panels and receives ample sunlight throughout the day.
Key considerations include:
- Roof material and age
- Shading from trees or nearby structures
- Roof angle and orientation
Step 2: Obtain Necessary Permits
Installing a rooftop solar system requires specific permits. Contact your local government or a professional installer to understand the regulations in your area.
Typical permits include:
- Building permits
- Electrical permits
- Zoning approvals
Step 3: Choose the Right Solar Panels
Selecting the appropriate solar panels is crucial for efficiency and cost-effectiveness. Consider factors like panel type, efficiency, and warranty.
Popular options include:
- Monocrystalline panels
- Polycrystalline panels
- Thin-film panels
Step 4: Install the Mounting System
The mounting system secures the solar panels to your roof.
Installation steps:
- Locate roof rafters and mark them.
- Attach the mounting brackets securely.
- Ensure brackets are level and aligned.
Step 5: Connect the Solar Panels
Once the mounting system is in place, it’s time to install the solar panels.
Steps include:
- Secure panels to the mounting brackets.
- Connect panels using the appropriate wiring.
- Ensure all connections are tight and weatherproof.
Step 6: Set Up the Inverter
The inverter converts the solar energy into usable electricity for your home.
Installation tips:
- Choose a location with adequate ventilation.
- Connect the inverter to the solar panels and your home’s electrical system.
Step 7: Final Inspection and Activation
After installation, a final inspection ensures everything is up to code and functioning correctly. Once approved, activate your system and start enjoying the benefits of solar energy.
Remember: Regular maintenance will keep your system running efficiently for years to come.
Navigating Permits and Regulations for Solar Installation
Attention: Thinking about how to install a rooftop solar system? You’re not alone. Many homeowners are turning to solar energy to reduce their carbon footprint and save on energy costs.
Problem: However, the process can be daunting, especially when it comes to navigating permits and regulations.
Promise: Fear not! With the right guidance, you can smoothly sail through the paperwork and get your solar panels up and running.
Understanding Local Regulations
Before diving into the installation process, it’s crucial to understand your local regulations. Each city or county may have specific requirements for solar installations. These can include zoning laws, building codes, and safety standards. Researching these regulations early can save you time and prevent costly mistakes.
Securing Necessary Permits
Once you’re familiar with the local rules, the next step is securing the necessary permits. Typically, you’ll need a building permit and an electrical permit.
- Building Permit: Ensures that your installation meets structural safety standards.
- Electrical Permit: Confirms that your system complies with local electrical codes.
Working with Professionals
Navigating permits can be complex, so consider working with a professional installer. They are familiar with the process and can help ensure all paperwork is correctly filed. This collaboration not only speeds up the process but also ensures compliance with all regulations, giving you peace of mind.
By understanding and following these steps, you’ll be well on your way to successfully installing a rooftop solar system, harnessing the power of the sun while staying compliant with local laws.
Choosing the Right Solar Panels for Your Home
When considering how to install a rooftop solar system, the first step is selecting the right solar panels for your home. This decision can seem daunting, but understanding your options can simplify the process. The promise of reduced energy bills and a smaller carbon footprint makes this effort worthwhile.
Understanding Solar Panel Types
Choosing the right solar panels involves understanding the different types available:
- Monocrystalline Panels: Known for high efficiency and sleek appearance, these panels are ideal for homes with limited roof space.
- Polycrystalline Panels: Slightly less efficient but more affordable, these are perfect for larger roofs.
- Thin-Film Panels: Flexible and lightweight, these are best for unconventional roof shapes.
Evaluating Your Roof’s Suitability
Before installation, assess your roof’s suitability:
- Roof Orientation: South-facing roofs receive the most sunlight.
- Roof Condition: Ensure your roof is in good condition to support the panels.
- Shading: Minimize shading from trees or other buildings to maximize efficiency.
Calculating Energy Needs
To choose the right solar panels, calculate your household’s energy needs. Review past electricity bills to determine your average consumption. This will help you decide the number of panels required to meet your energy goals. By considering these factors, you can confidently select the best solar panels for your rooftop solar system installation.
How FreeSolarQuotes Can Help You Install a Rooftop Solar System
Are you ready to harness the power of the sun but unsure where to start? The journey of learning how to install a rooftop solar system can seem daunting. But worry not, because FreeSolarQuotes is here to simplify the process and guide you every step of the way. We promise to transform your solar ambitions into reality with ease and expertise.
Step-by-Step Guide to Installing a Rooftop Solar System
1. Initial Assessment and Planning
Before diving into installation, it’s crucial to evaluate your roof’s suitability. Consider factors like roof orientation, shading, and structural integrity. FreeSolarQuotes provides a comprehensive assessment to ensure your roof is solar-ready.
2. Selecting the Right Equipment
Choosing the right solar panels and inverters is essential for efficiency. Our experts at FreeSolarQuotes help you select equipment tailored to your energy needs and budget, ensuring optimal performance.
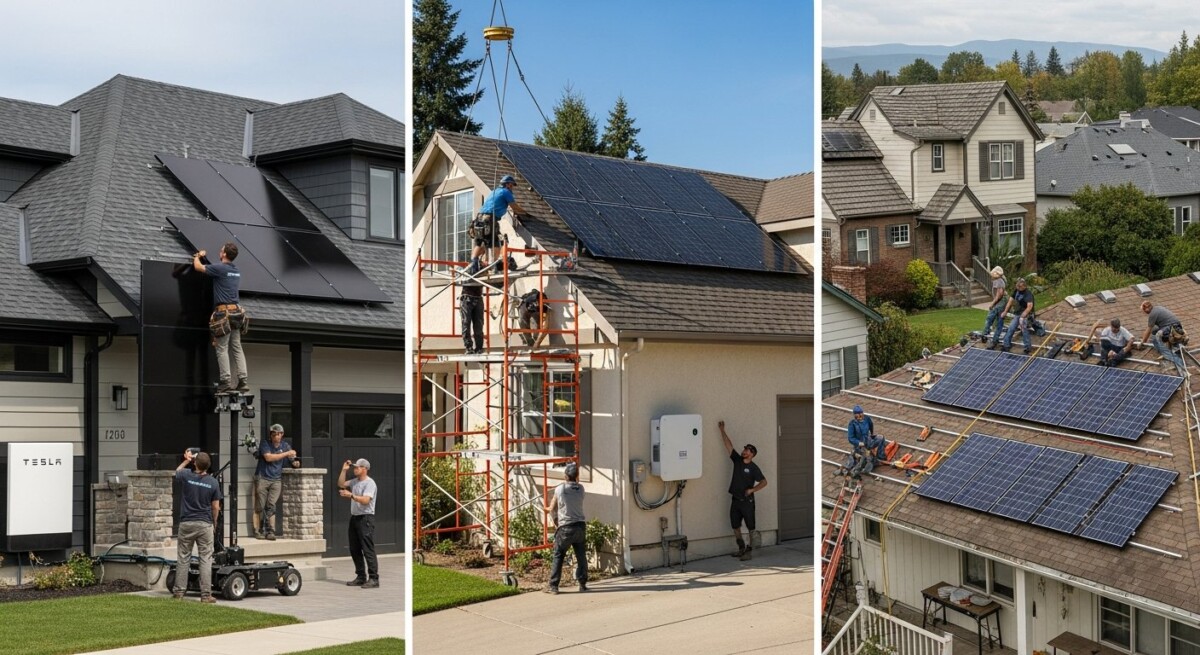
3. Professional Installation
Once the planning and equipment selection are complete, professional installation is key. Our certified installers ensure a seamless setup, adhering to all safety standards and regulations.
4. System Activation and Monitoring
After installation, activating and monitoring your system is vital for maximizing benefits. FreeSolarQuotes offers ongoing support to ensure your solar system operates efficiently, providing you with peace of mind and sustainable energy savings.
Maintaining Your Solar System: Tips for Long-Term Efficiency
Installing a rooftop solar system is a fantastic way to harness the sun’s power and reduce your energy bills. However, ensuring your system runs efficiently over the years requires regular maintenance. Without proper care, even the best solar installations can underperform, leading to reduced energy savings and potential system failures. But don’t worry, maintaining your solar system is simpler than you might think, and with a few straightforward steps, you can keep it operating at peak performance for years to come.
Regular Cleaning
- Dust and Debris Removal: Regularly clean your solar panels to remove dust, leaves, and bird droppings. A clean surface ensures maximum sunlight absorption.
- Use Soft Materials: Always use a soft cloth or sponge with water to avoid scratching the panels.
Monitoring System Performance
- Check Energy Output: Regularly monitor your system’s energy output to ensure it’s consistent with expected levels. Sudden drops could indicate a problem.
- Use Monitoring Apps: Many systems come with apps that help track performance and alert you to issues.
Professional Inspections
- Annual Check-Ups: Schedule annual inspections with a professional to assess the system’s condition and address any potential issues.
- Warranty and Service Plans: Consider service plans that cover maintenance and repairs, ensuring peace of mind and long-term efficiency.
By following these maintenance tips, you can ensure your rooftop solar system continues to provide clean, renewable energy efficiently. Remember, a little effort in maintenance goes a long way in maximizing your investment and contributing to a sustainable future.
FAQ
- What are the steps to install a rooftop solar system?
The process includes assessing energy needs, site inspection, getting permits, installing panels, connecting to the grid, and monitoring performance. - How do I determine the right size for my rooftop solar system?
Your system size should be based on your energy consumption, roof space, and local solar potential. - What type of roof is best for solar installation?
Most roofs, including asphalt shingles, metal, and concrete, are suitable, but structural integrity must be assessed. - How long does it take to install a rooftop solar system?
Installation typically takes 1–3 days, but permitting and approval can add several weeks. - Do I need to hire a professional to install my solar panels?
Yes, professional installation ensures compliance with local regulations, optimal placement, and warranty protection.
Join the solar movement today! Thousands are already saving—claim your free consultation to get started. Schedule Your Free Consultation at FREE SOLAR POWER QUOTES
Interested in more options? Take a look at SOLAR ENERGY for tailored solar solutions that suit your home!