Solar Panel Mounting Rails: Guide for Homeowners
Solar panel mounting rails are a critical part of any […]

By Caleb Morgan
Learn more about Solar Panel Installation and Repair for guides, costs, and what to expect.
Compare Solar Panel Installation and Repair Pros Near You

Enter your ZIP code to compare top-rated local professionals and request free quotes.
Solar panel mounting rails are a critical part of any solar energy system, providing the structural support needed to keep your panels safely secured and optimally positioned. As more U.S. homeowners adopt solar energy, understanding how these rails work-and which type is right for your roof or ground system-can help you make smarter choices during installation.
Mounting rails do more than just hold panels in place; they determine the angle of exposure, influence airflow for cooling, and affect system durability in high winds or heavy snow. Whether you’re installing a DIY solar kit or hiring professionals, choosing the right rails is essential to performance and longevity.
In this guide, we’ll explain the role of solar panel mounting rails, the materials and configurations available, how to choose the best option, and the proper way to install and maintain your rail system.
What Are Solar Panel Mounting Rails?
Solar panel mounting rails are structural bars or tracks that secure solar panels to rooftops, ground mounts, or pole systems. These rails provide the framework upon which panels are clamped, allowing them to be aligned properly and withstand environmental stresses such as wind, snow, and heat.
They’re usually made from durable, corrosion-resistant materials such as aluminum and stainless steel. Solar mounting rails come in various sizes, shapes, and configurations depending on the roof type (flat or pitched), panel layout, and the location’s climate conditions.
Why Mounting Rails Matter
Properly installed rails:
-
Ensure long-term system durability
-
Prevent damage from wind uplift or shifting panels
-
Maximize solar exposure with correct tilt angles
-
Enable modular and expandable system design
-
Comply with local codes and utility standards
Incorrect rail systems can lead to panel damage, reduced energy output, or safety risks.
Types of Solar Panel Mounting Rails
1. Standard Roof Rails
Used in most residential roof-mounted systems. Panels are clamped to horizontal rails, which are attached to roof anchors.
2. Rail-less Systems
Use mounting brackets and clamps without long rails. Easier to install but less flexible and typically for smaller systems.
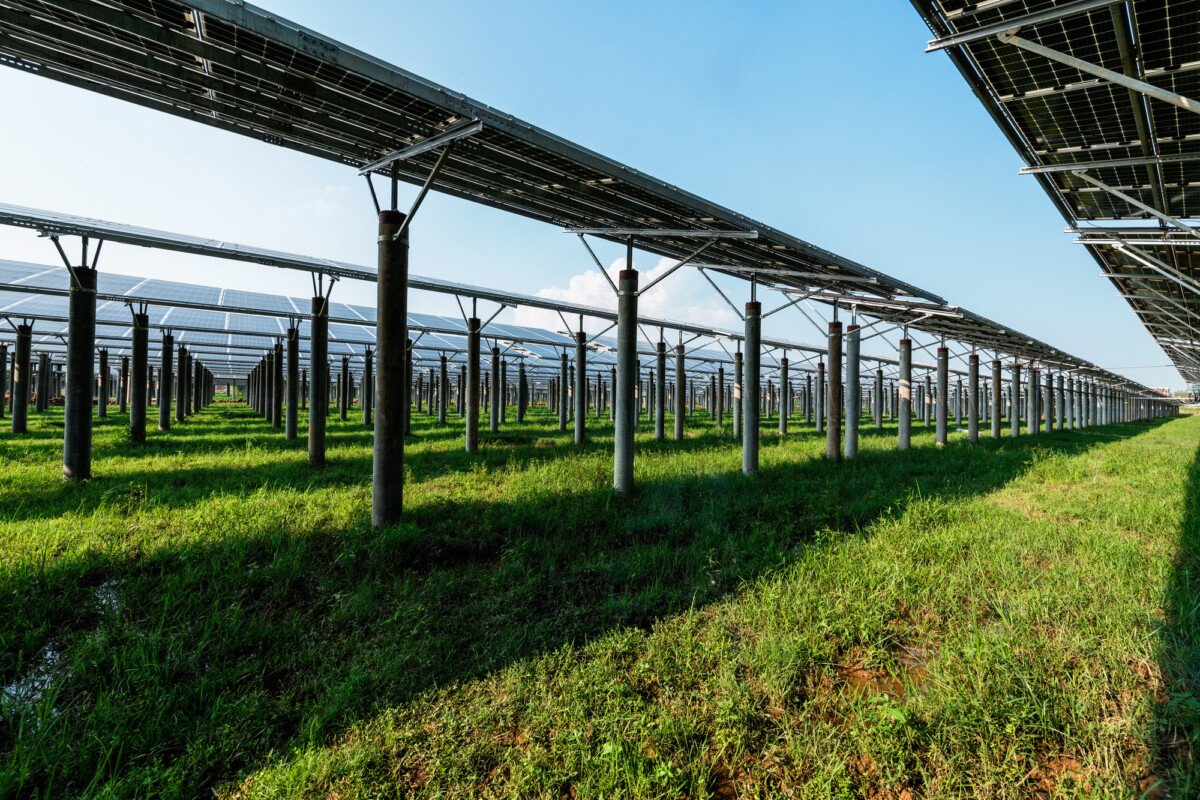
3. Ground Mount Rails
Longer, more robust rails used for panels mounted on the ground. Often require concrete footings.
4. Pole Mount Systems
Panels are mounted to a central pole with rotating or fixed arms. Rails support the tilt adjustment and hold the panel array.
Rail Materials and Durability
| Material | Durability | Benefits |
|---|---|---|
| Aluminum | High (corrosion-resistant) | Lightweight, rust-proof, cost-effective |
| Stainless Steel | Very high | Excellent in coastal/humid regions |
| Galvanized Steel | Moderate | Strong, heavier, more affordable |
Most modern residential systems use anodized aluminum for its balance of strength, weight, and corrosion resistance.
Ready to make the switch? Discover how solar power can lower your bills and boost your home’s efficiency. Get a Free Solar Estimate at FREE SOLAR POWER QUOTES
Mounting Rails and Roof Compatibility
Asphalt Shingles
Rails are attached using lag bolts and flashing to prevent leaks. Very common in U.S. homes.
Tile Roofs
Require specialized mounting systems or tile replacement for secure installation.
Metal Roofs
Standing seam clamps can attach rails without penetrating the roof, preserving waterproofing.
Flat Roofs
Often use ballast mounts or adjustable tilt rails to angle panels for sun exposure.
Choosing the Right Mounting Rail System
Consider these factors:
-
Roof Type and Pitch - Ensure your rail system is compatible with your roof structure.
-
Wind and Snow Loads - Local codes may require stronger materials or closer rail spacing.
-
Panel Size and Layout - Match the rail length and spacing to your panel dimensions.
-
Aesthetics - Low-profile rail designs blend better with rooftops.
-
Installation Type - DIY-friendly kits often include universal rail systems with clear instructions.
Cost of Solar Panel Mounting Rails
| System Type | Estimated Rail Cost | Notes |
|---|---|---|
| Residential Roof | $100 - $300 (per kW) | Depends on layout and roof type |
| Ground Mount | $150 - $400 (per kW) | Includes rails and support structure |
| Rail-less Systems | $75 - $150 (per kW) | Fewer materials but harder to adjust |
Costs vary by manufacturer, rail profile, and whether the kit includes clamps, bolts, and grounding lugs.
Installation Guide: How to Mount Rails
Step 1: Plan the Layout
Measure your roof area, panel sizes, and optimal sunlight angles. Determine how many rails and standoffs you need.
Step 2: Attach Flashing and L-Foot Brackets
Drill into rafters (not just decking) for secure attachment. Use flashing to maintain a watertight seal.
Step 3: Mount the Rails
Secure rails onto L-foot brackets using bolts. Ensure they are level and properly spaced for your panel dimensions.
Step 4: Ground the System
Attach grounding lugs and wires per local code to prevent electrical faults.
Step 5: Secure Panels
Use clamps to attach solar panels to the rails. Torque bolts to manufacturer specifications.
Maintenance Tips for Mounting Rails
-
Inspect Annually: Check for loose bolts, rust, or structural wear.
-
Clear Debris: Remove leaves, snow, or animal nests from the mounting area.
-
Check Sealant: Ensure roof penetrations remain watertight.
-
Tighten Connections: Temperature shifts can loosen fasteners over time.
High-quality rail systems should last 25+ years with minimal upkeep.
Advantages of Using Mounting Rails
-
Stability: Rails distribute panel weight evenly across the roof.
-
Customization: Adjustable rail systems support diverse layouts.
-
Expandability: Easy to add panels later without modifying existing setup.
-
Code Compliance: Most U.S. building codes require certified racking systems.
5 FAQs About Solar Panel Mounting Rails
1. Are mounting rails necessary for all solar systems?
Most roof-mounted systems require rails, though rail-less options exist for small or specialized installs.
2. Can I install solar mounting rails myself?
Yes, many systems are DIY-friendly, especially if your roof is easy to access and you follow safety and code guidelines.
3. How far apart should solar panel mounting rails be?
Spacing typically ranges from 40 to 70 inches depending on panel size and local wind/snow load requirements.
4. Do rails come with solar panel kits?
Some DIY solar kits include rails, while others require separate purchase based on your specific roof type.
5. How long do solar mounting rails last?
High-quality aluminum or stainless-steel rails can last 25-30 years, matching or exceeding the life of your panels.
Final Thoughts
Solar panel mounting rails are an essential part of any residential solar setup. From enhancing structural stability to optimizing panel angle and airflow, these rails play a key role in energy production and safety. Choosing the right rail system based on your roof, climate, and energy goals ensures a longer-lasting and more effective solar installation. Whether you’re hiring a professional or taking the DIY route, investing in high-quality rails will pay off in both performance and peace of mind.
Join the solar movement today! Thousands are already saving-claim your free consultation to get started. Schedule Your Free Consultation at FREE SOLAR POWER QUOTES
Interested in more options? Take a look at SOLAR ENERGY for tailored solar solutions that suit your home!
Learn more about Solar Panel Installation and Repair for guides, costs, and what to expect.
Compare Solar Panel Installation and Repair Pros Near You
Enter your ZIP code to compare top-rated local professionals and request free quotes.