
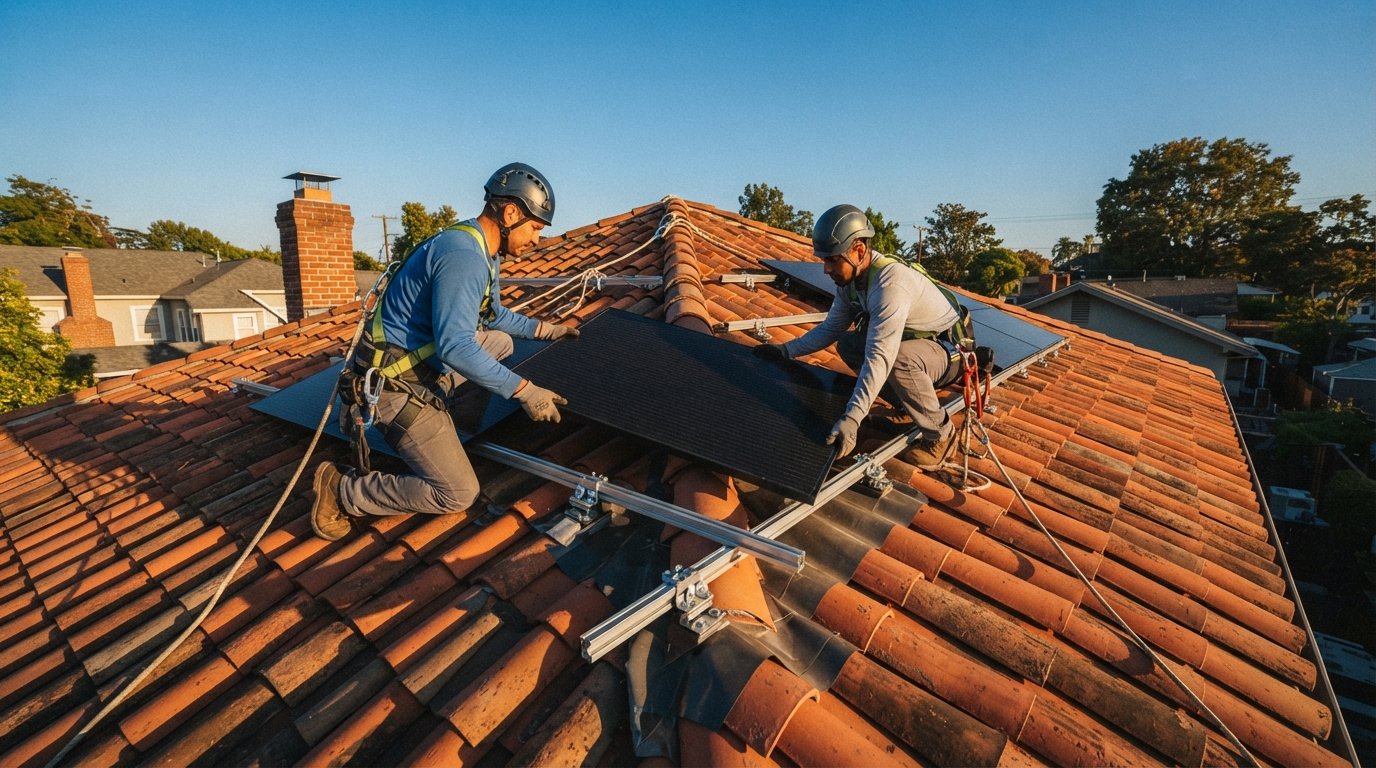
Solar Panel Installation on Flat Tile and Historic Roofs
Solar panel installation on flat tile and historic roofs demands specialty mounts and preservation review. Call (833)-793-7166 for vetted installer quotes.

By Elena Walsh
Learn more about Solar Panel Installation and Repair for guides, costs, and what to expect.
Compare Solar Panel Installation and Repair Pros Near You

Enter your ZIP code to compare top-rated local professionals and request free quotes.
Flat tile and historic roofs present some of the most demanding conditions in residential solar. A 1920s clay tile bungalow or a flat-roofed midcentury modern home may offer excellent sun exposure, yet the mounting hardware, waterproofing details, and approval process look nothing like a standard asphalt shingle job. Homeowners who understand these differences early can avoid failed inspections, voided roof warranties, and preservation board rejections that delay a project by months.
This guide breaks down how solar panel installation on flat tile and historic roofs actually works in the United States, from attachment hardware and ballast design to historic district reviews and the cost premiums you should expect. It also explains where to find vetted installers who have real experience with these roof types, so you can compare quotes with confidence instead of guesswork.
Why Flat and Tile Roofs Change the Solar Conversation
Most solar installation training centers on pitched composition shingle roofs, where standard flashings and rail systems solve nearly every problem. Flat roofs and tile roofs break that mold. On a flat roof, panels cannot simply lie flush against the surface, because rainwater must still drain and debris must not collect under the array. On a tile roof, drilling through brittle clay or concrete can crack tiles and create leak paths that are expensive to trace.
Historic roofs add a third layer of complexity. Local preservation ordinances may restrict visible hardware, require reversible attachments, or demand that any changes preserve the building's character. A solar array that would sail through permitting in a new subdivision can stall for weeks in a historic district if the design ignores those rules. The result is that flat tile and historic roofs reward planning over speed, and they reward installers who have solved these problems before.
None of this means solar is impractical on these roofs. It means the design phase matters more. Mounting method, penetration strategy, aesthetic treatment, and documentation all need to be settled before a single panel goes up, and the sections below walk through each decision in turn.
Mounting Hardware and Attachment Methods for Flat Roofs
Flat roof solar systems generally rely on one of two strategies: ballasted mounts that hold panels down with weight, or mechanically attached mounts that bolt into the roof structure. Ballasted systems use concrete blocks, gravel pans, or engineered weights to resist wind uplift without piercing the membrane. They are popular on commercial buildings and on homes with membrane roofs such as TPO or EPDM, because they preserve the waterproof layer and simplify removal later.
Mechanically attached systems use lag bolts, structural screws, or threaded rods that connect the mounting rail directly to rafters or blocking. These penetrations must be sealed with proper flashing, sealant, and sometimes a secondary membrane patch. The tradeoff is straightforward: ballast avoids holes but adds substantial weight and may not suit every structural deck, while penetrations are lighter and more secure in high-wind zones but demand flawless waterproofing.
Between those two poles, installers choose from several hardware families. The list below covers the options you will most often see quoted for flat and low-slope roofs:
- Ballasted tilt racks: Weighted bases that tilt panels toward the sun, common on large flat roofs with strong structural capacity.
- Penetrating tilt legs: Bolted stanchions that raise panels at an angle, sealed at each roof penetration.
- Non-penetrating adhesive mounts: Chemical bonding systems for specific membrane types, used sparingly and only where the manufacturer approves.
- East-west low-profile racks: Shallow-angle racks that reduce wind uplift and row spacing, often paired with higher-efficiency modules.
Wind uplift is the governing force on flat roofs, not gravity. Building codes such as ASCE 7 set pressure coefficients that vary by roof zone, and corner and perimeter areas experience far higher uplift than the field. A qualified installer will calculate ballast weight or fastener count per zone rather than applying a single uniform pattern. If a quote does not mention wind zones, structural review, or roof membrane type, treat that as a warning sign.
Solar Panel Installation on Tile Roofs: Attachments That Protect the Tiles
Tile roofs, whether clay, concrete, or synthetic, are beautiful and long-lived, but they are also brittle and uneven. The standard approach is to avoid drilling through the tile itself. Instead, installers use tile hooks or tile replacement mounts that attach to the roof structure beneath the tile layer and then flash over the penetration. The tile above is either carefully lifted and returned, or replaced with a purpose-built flashing tile that integrates with the mounting foot.
Two broad methods dominate. The first is the hook or bracket method, where a metal hook slides under an existing tile and bolts to a rafter, with the tile notched or ground slightly to fit around the hook. The second is the replacement method, where a specialized flashing tile takes the place of one original tile and provides a factory-sealed attachment point. Replacement mounts usually cost more per unit but reduce the risk of cracked tiles and callbacks.
Tile type matters enormously. Spanish clay barrel tiles, flat concrete tiles, and thin synthetic slate all behave differently under foot traffic and compression. Walking on a tile roof without protection can crack tiles even before installation begins, which is why experienced crews lay down walk pads and use tile-lifting tools. If your installer plans to drill straight through the field of tiles and seal with caulk, that approach may void your roof warranty and create leaks that appear only after several seasons of thermal expansion.
The best time to plan tile roof solar is during a roof replacement or immediately after. Lifting and resetting tiles is far easier when the underlayment is new, and any broken tiles can be replaced from the same batch. If your tile roof is nearing the end of its service life, addressing it first usually costs less than removing and reinstalling an array later.
Ballasted Versus Penetrating Mounts: A Practical Tradeoff
Choosing between ballasted and penetrating mounts is one of the most consequential decisions on a flat roof. Ballasted systems avoid roof penetrations entirely, which protects the membrane warranty and simplifies leak prevention. They also allow relatively easy removal if the roof needs service. However, ballast adds hundreds or thousands of pounds of dead load, and the structural deck must be evaluated by an engineer to confirm it can carry that weight along with snow or ponding water.
Penetrating mounts are lighter and often cheaper in material, but every penetration is a potential leak if the flashing is done poorly. On membrane roofs, a proper penetration includes a pipe boot or pitch pan, compatible sealant, and often a reinforced patch. On historic buildings, penetrations may also conflict with preservation requirements if they alter visible roof surfaces.
The decision usually comes down to four factors:
- Structural capacity: Can the deck safely carry ballast weight plus snow and wind loads?
- Roof membrane type and warranty: Some manufacturers void coverage for certain attachment methods.
- Wind exposure: High-uplift zones may require penetrations or hybrid systems.
- Preservation rules: Historic districts may limit visible hardware and roof alterations.
In practice, many flat roof projects use a hybrid: ballast in the field where uplift is moderate, and mechanical attachments at corners and perimeters where wind pressure peaks. That approach balances weight, cost, and safety, but it requires wind-zone engineering rather than a one-size-fits-all kit.
Historic District Rules and Preservation Review
If your home sits in a locally designated historic district or is individually listed on a historic register, solar installation typically requires a certificate of appropriateness or a similar preservation review. These reviews are not designed to ban solar. They are designed to ensure that visible changes do not harm the building's historic character. That distinction matters, because many homeowners assume rejection is automatic when it is not.
Reviewers commonly evaluate visibility from the public right of way, the reversibility of attachments, and the treatment of historic materials. Panels hidden behind a parapet, set back from the front slope, or mounted on a rear roof plane are far more likely to win approval than arrays dominating the street-facing elevation. All-black modules, low-profile racking, and color-matched conduit can also reduce visual impact.
Your application package usually needs to include roof plans, elevation drawings, product specifications, mounting details, and sometimes a structural letter. Hiring an installer who has shepherded projects through your local preservation commission can save weeks of back-and-forth. If you are still comparing providers, resources such as verified solar installer networks can help you find contractors who routinely work in historic districts rather than treating your project as a first attempt.
State and federal historic preservation offices may also have guidance, and the National Park Service has published bulletins on solar installations for historic buildings. Review those documents early, because they often shape what local commissions expect. Timing matters too: some commissions meet only monthly, so a missed deadline can push your installation into the next quarter.
Cost Premiums and What Drives Them
Solar panel installation on flat tile and historic roofs generally costs more than a standard shingle roof job. The premium comes from labor, hardware, engineering, and administrative work, not from the panels themselves. Tile roofs require careful tile handling and specialized mounts. Flat roofs require structural review and either ballast engineering or meticulous flashing. Historic projects add design, documentation, and review costs.
Typical drivers of the premium include the following items, which you should see itemized or at least explained in a detailed quote:
- Specialized mounting hardware: Tile hooks, replacement flashings, and engineered ballast systems cost more than standard rail feet.
- Additional labor hours: Lifting tiles, laying walk pads, and flashing penetrations take longer than shingle work.
- Structural or engineering letters: Flat roofs and heavy ballast often require a stamped evaluation.
- Preservation review support: Drawings, submittals, and commission attendance add administrative cost.
- Roof condition remediation: Broken tiles or aging membrane may need repair before solar goes on.
Because these factors vary so widely by region and roof type, the only reliable way to know your number is to collect multiple itemized quotes. A quote that lumps everything into one price without explaining mounting method or engineering assumptions is difficult to compare and easy to underdeliver. Ask each installer to state the mounting approach, the flashing details, the wind-uplift assumptions, and whether the work complies with local preservation rules.
What to Look for in an Installer
Flat tile and historic roof experience is a specialty, and not every solar company has it. The right installer will ask about your roof material, underlayment age, and historic status before proposing a design. They will show photos of comparable projects, explain how they seal penetrations, and describe how they handle broken tiles. They will also be honest about what they do not know and bring in a structural engineer or preservation consultant when needed.
During your evaluation, ask direct questions and listen for specific answers. Vague reassurance about waterproofing or historic approvals is a red flag. So is reluctance to put mounting details in writing. A reputable contractor will welcome scrutiny, because complex roofs punish shortcuts long after the final payment. If you are planning a move or coordinating solar with a relocation, relocation guides such as Moving.Homes can help you time the project alongside your closing and moving logistics.
Finally, verify licensing, insurance, and warranty terms. Roof warranties and solar workmanship warranties should both be in writing, and you should understand who is responsible if a leak appears two years later. On historic projects, confirm that the installer will handle or support the preservation submittal rather than leaving that entirely to you.
Getting Quotes That Reflect Your Actual Roof
The fastest way to waste money on solar is to accept a quote built for a different roof. Flat tile and historic roofs demand site-specific design, and the quote should reflect that. Provide photos, roof age, material details, and any historic designation information when you request bids. Then compare not just the total price but the mounting method, flashing plan, engineering assumptions, and preservation strategy.
FreeSolarPowerQuotes connects homeowners with pre-screened local installers who provide free, no-obligation quotes, which makes side-by-side comparison far easier. You can also review financing options and incentive details before you commit, since the 30 percent federal tax credit and any state or utility programs can change the effective cost significantly. Verify current incentive rules with official sources, because programs evolve and deadlines shift.
Complex roofs are not a reason to abandon solar. They are a reason to choose your installer carefully and to insist on details in writing. Do that, and a flat tile or historic roof can host a durable, high-performing array that respects the building and pays back for decades.