
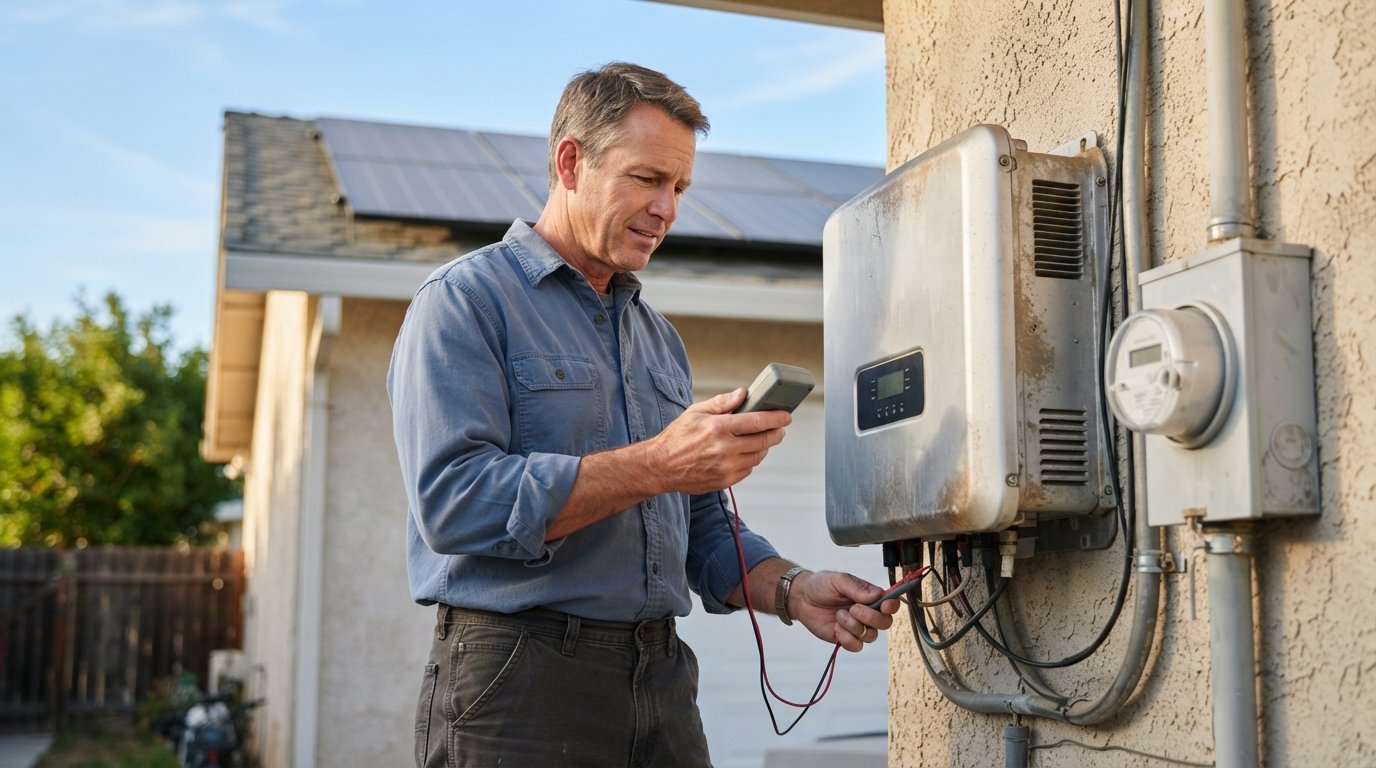
Solar Inverter Failure Signs and Replacement Planning
Solar inverter failure signs and replacement planning help you spot early warnings, budget for a new unit, and avoid peak-season emergency pricing.

By Caleb Morgan
Learn more about Solar Panel Installation and Repair for guides, costs, and what to expect.
Compare Solar Panel Installation and Repair Pros Near You

Enter your ZIP code to compare top-rated local professionals and request free quotes.
A solar inverter is the hardest-working component of your home energy system. It converts the direct current electricity your panels produce into the alternating current your home appliances actually use. It also manages voltage, tracks performance, and in many systems handles communication with monitoring apps and the grid. When it fails, your panels may still be soaking up sunlight, but your home stops benefiting from them. The tricky part is that inverters rarely die overnight. They usually send warnings for months, and homeowners who learn to read those signals can plan a replacement on their own schedule instead of paying emergency prices during a heat wave or a holiday weekend.
Why Inverters Fail and What It Means for Your System
Most residential inverters are designed to last between 10 and 15 years, while solar panels themselves often carry 25-year performance warranties. That mismatch is the single most important fact in replacement planning. Your inverter will almost certainly need to be replaced at least once during the life of your panel system, and possibly twice if you install early and choose a lower-tier brand. Understanding why they fail helps you predict when yours might be next.
Heat is the leading killer. Inverters sit in garages, on exterior walls, or beside the meter, often in full sun. Electronics degrade faster at high temperatures, and every summer of 100-degree afternoons shortens the lifespan of internal capacitors and circuit boards. Humidity and salt air accelerate corrosion in coastal markets like Florida and the Gulf Coast. Voltage surges from lightning, grid switching, or utility fluctuations can fry sensitive components in an instant. Manufacturing defects and firmware bugs also play a role, which is why some units fail at year four while an identical model runs for 15 years down the street.
There are three broad inverter categories in residential solar, and each has a different failure profile. String inverters are the most common and the least expensive, but they are a single point of failure: when the one box dies, the whole array goes dark. Microinverters are mounted under each panel, so a failure affects only one panel and is usually covered by a longer warranty. Hybrid inverters add battery management, which means more electronics and more potential failure points, but also more capability when they work. If you want a deeper breakdown of how these categories interact with storage, our guide on solar inverter and battery systems walks through the differences in plain language.
Knowing the typical failure window for your specific model matters more than any general rule. Search your inverter's model number plus the word "failure" or "lifespan" in homeowner forums. If hundreds of owners report the same error code at year eight, you can reasonably plan a replacement budget around that timeline instead of waiting for a surprise.
Solar Inverter Failure Signs You Should Never Ignore
Inverter failure is usually a slow decline, not a sudden death. The earliest signs are easy to dismiss as weather, shading, or a flaky app. By the time the unit stops producing entirely, you have often lost weeks or months of generation you could have captured with an earlier repair. Watch for these signals and treat any two occurring together as a strong warning.
- Production drops without a weather explanation. Compare your daily or weekly output to the same period last year. A 10 to 20 percent decline on clear days, with no new shade trees or dirty panels, often points to inverter degradation.
- Frequent error codes or fault messages. Isolated faults after a storm are normal. Repeated ground faults, arc faults, or DC injection errors within a few weeks suggest internal component failure.
- Loud humming, buzzing, or clicking. A quiet hum is normal. Rattling, grinding, or a clicking that cycles on and off indicates failing fans, relays, or capacitors.
- Burning smell or visible scorch marks. This is an immediate safety issue. Shut down the system at the disconnect and call a professional the same day.
- Monitoring app goes dark or reports the inverter offline. If a power cycle and a Wi-Fi check do not fix it, the communication board or the main control board may be failing.
One more sign deserves its own mention: a unit that repeatedly trips your system offline during peak afternoon hours. This often means the inverter is overheating and derating itself to survive. It may still produce in the morning, which fools homeowners into thinking everything is fine. If you notice output collapsing between noon and 4 p.m. on hot days, have the unit inspected before summer ends.
Age alone is also a signal. Once a string inverter passes year 12, the probability of failure climbs sharply each year. At that point, proactive replacement planning is cheaper and less stressful than reactive repairs, even if the unit is technically still running.
How to Diagnose the Problem Before You Replace Anything
Before you assume the inverter is dead, rule out the cheaper explanations. Plenty of homeowners have paid for a replacement only to learn the real issue was a tripped breaker, a blown DC fuse, or a monitoring gateway that lost its internet connection. A structured diagnostic sequence saves money and prevents unnecessary work.
- Check the basics. Confirm the AC disconnect and the breaker at your main panel are both on. Look for a tripped GFCI or a blown fuse in the DC disconnect box.
- Review the error log. Most inverters store a fault history. Write down the exact codes and how often they appear. This information is gold for your installer and for warranty claims.
- Verify monitoring connectivity. If the app says offline but the inverter screen looks normal, the problem may be your router, not the hardware.
- Test production manually. On a clear midday, check whether the inverter display shows real-time watts close to what your system size should produce.
- Call a licensed solar technician. DC-side diagnostics involve live high-voltage wiring. This is not a DIY job, and improper handling can void warranties or create fire risk.
If the technician confirms the inverter itself has failed, ask for a written diagnosis with the specific fault codes and component failures. You will need this document for warranty claims, insurance discussions, and any replacement quote you request. It also protects you from installers who recommend a full replacement when a $300 repair would restore the unit for another three years.
One practical note: repairs make sense when the inverter is under warranty, when the unit is less than eight years old, or when the failed part is a relatively inexpensive fan or communication board. Repairs rarely make sense when the unit is out of warranty, over 12 years old, and suffering from multiple fault types. At that point you are paying to postpone the inevitable.
Replacement Planning: Budget, Timeline, and Warranty Strategy
Replacement planning starts with a budget number, and that number depends heavily on the type of inverter you choose. A like-for-like string inverter replacement typically runs $1,500 to $3,000 installed, depending on system size and labor. Upgrading to a hybrid inverter with battery readiness can run $3,000 to $6,000 or more. Microinverter replacements are usually handled per-panel under warranty, but out-of-warranty labor to access roof-mounted units can add several hundred dollars per visit.
Timing matters as much as price. Inverter replacements take one to three weeks from quote to commissioning in normal markets, but lead times stretch to six or eight weeks during peak season or after a major storm when every installer is slammed. If your inverter is showing late-stage failure signs in spring, schedule the replacement before summer, not during it. You will pay less, wait less, and avoid losing your highest-production months.
Warranty strategy is where planning pays off most. Most string inverters carry a 10-year standard warranty with options to extend to 20 or 25 years at purchase. If your original installer is still in business, file the claim before you authorize any replacement work. If the manufacturer has gone bankrupt, which has happened repeatedly in the solar industry, you may be on your own, and that reality should push you toward brands with strong US service networks and long track records.
Also consider whether replacement is the moment to upgrade rather than restore. If you plan to add a battery, an EV charger, or more panels in the next few years, choosing a hybrid inverter now avoids paying for two installations. If your utility has moved to time-of-use rates, a smarter inverter with better monitoring and grid support features can pay back part of its cost through optimized production and export timing.
Choosing the Right Inverter and Installer for the Job
Replacement is a rare chance to fix whatever annoyed you about the original system. If your monitoring was clunky, prioritize a brand with a better app. If your inverter died from heat, insist on a shaded mounting location or a unit rated for higher ambient temperatures. If you lost the whole array when one box failed, consider microinverters or a string inverter with module-level power electronics so a future failure affects less of your production.
Installer selection deserves as much attention as brand selection. Get at least three quotes, and make sure each one includes the inverter model number, warranty terms, labor warranty length, permitting responsibility, and whether the price includes monitoring setup and utility re-commissioning paperwork. A cheap quote that leaves you handling permits and inspections is not actually cheap.
This is also the stage where an independent quote service saves real money. Rather than calling installers one by one, you can use a platform like NewSolarQuotes to compare vetted local providers side by side, which typically surfaces a wider price range and lets you negotiate from a stronger position. Whether you use that route or contact installers directly, never sign a replacement contract until you have seen at least two competing proposals with itemized equipment and labor line items.
Costs, Incentives, and Insurance Angles Homeowners Miss
Replacement costs are not always fully out of pocket. The federal residential clean energy credit has historically covered a percentage of solar equipment costs, including inverters, when they are part of a qualified system upgrade. Rules and percentages change, so verify current eligibility with a tax professional or the official IRS guidance before you count on any credit.
Homeowner insurance is another overlooked angle. If your inverter failed due to a lightning strike, a power surge, or storm damage, your policy may cover part or all of the replacement. Document everything: photos of the unit, the technician's diagnosis, and any utility records showing grid disturbances around the failure date. Filing a claim without documentation is the fastest way to get denied.
Finally, think about the financial framing. A $2,500 replacement on a system that saves $1,800 per year pays for itself in under two years of restored production. Homeowners who delay replacement because of the upfront cost often lose more in missed generation than they would have spent on the new unit. Treat the inverter as a consumable part of a long-term investment, not as a failure of the whole system.
If your inverter is more than a decade old, showing intermittent faults, or producing noticeably less than last year, start planning now. Get a professional diagnosis, gather competing quotes, check your warranty and insurance options, and schedule the work before peak season. A planned replacement is a routine maintenance event. An unplanned one is an emergency, and it always costs more.